SteamDeck upgrades
It has been some time since I preordered the SteamDeck. Looking back at what I thought about it back then, there are many things I was right about. What surprised me the most is the amount of games I played on the Deck that I could have played on my computer instead. There is something about sitting in the garden or on the couch and playing a Metroidvania that is oddly relaxing. Given that I do enjoy my little handheld and it has served me well for a few years now, I thought it was time for some small upgrades.
I ordered a new NVMe and hall effect sticks. I have more than enough thermal paste and phasesheet ptm around, so I did not need to place an order. Technically I ordered a WD NVMe, but decided to repurpose it and got a good deal on the Sabrent.
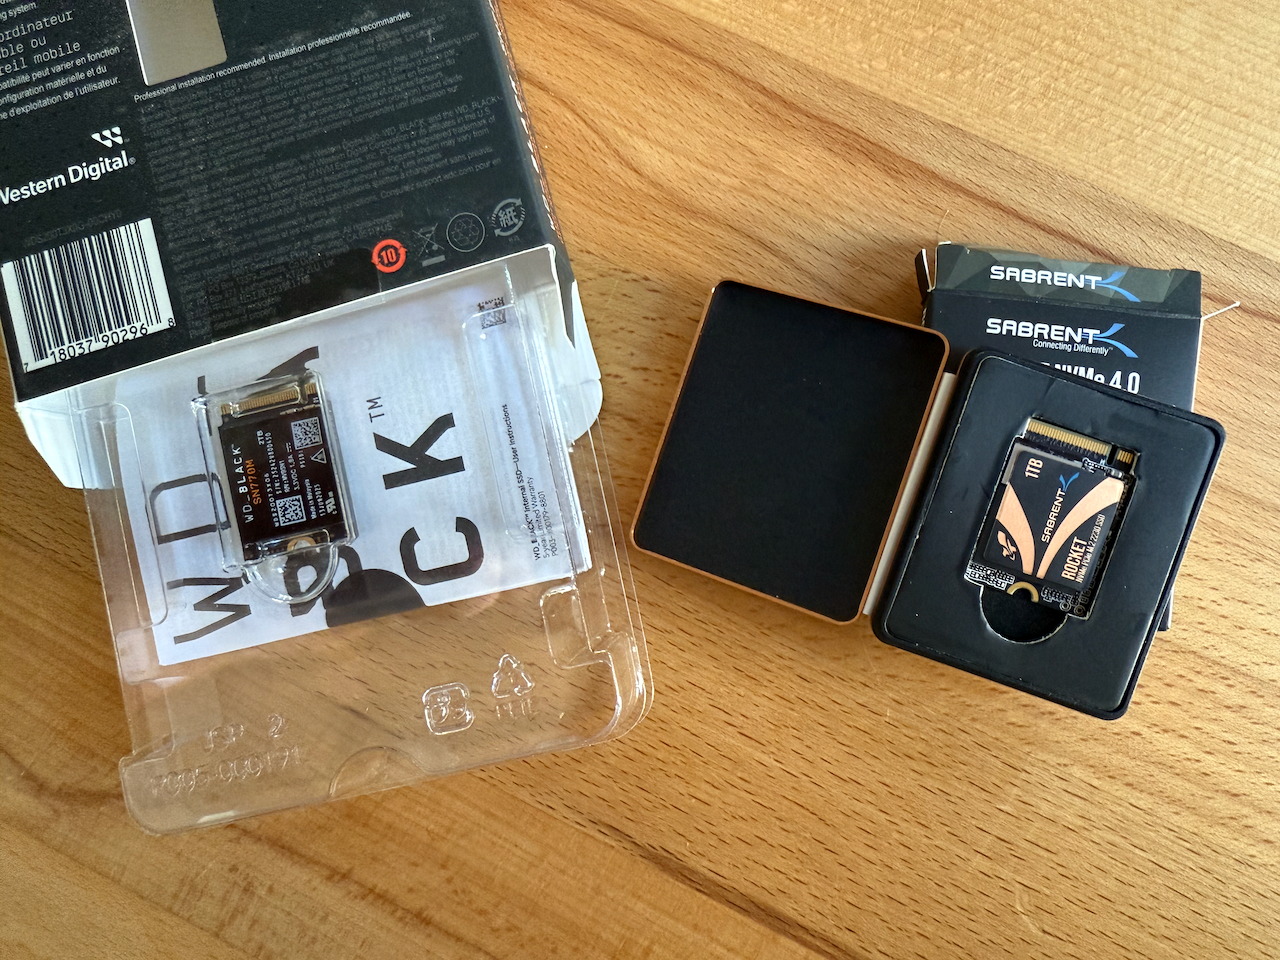
When picking a NVMe it really does not matter a lot what you get. Get the cheapest one, the one from a brand you like or the one with the best warranty. The SteamDeck internally uses an PCIe Gen3 x4 bus and you will most likely get an PCIe Gen4 x4 NVMe anyway, so speed is limited by the device, not the disk. That being said there is a small, but noticeable difference between the Samsung PM991a Valve ships and the Sabrent.
(A very important detail (/s) - Sabrents packaging is so much better than WesternDigitals. Nicer and less packaging!)
If you do some research for NVMes you might see some discussions online around QLC vs TLC NAND flash. Having made the comparison myself, I’ve come to the conclusion that it’s fine either way. The 2TB Sabrent is a QLC drive, the 1TB a TLC. QLC is less durable for heavy write workloads, something you will likely not do with your SteamDeck anyway, but is cheaper to manufacture. Even if the drive would fail… big whoops. Save games are all synced via Steam. Replace the disk and you are back in business. And the higher IOPS for TLC will likely not make a difference considering the PCIe Gen3 bus.
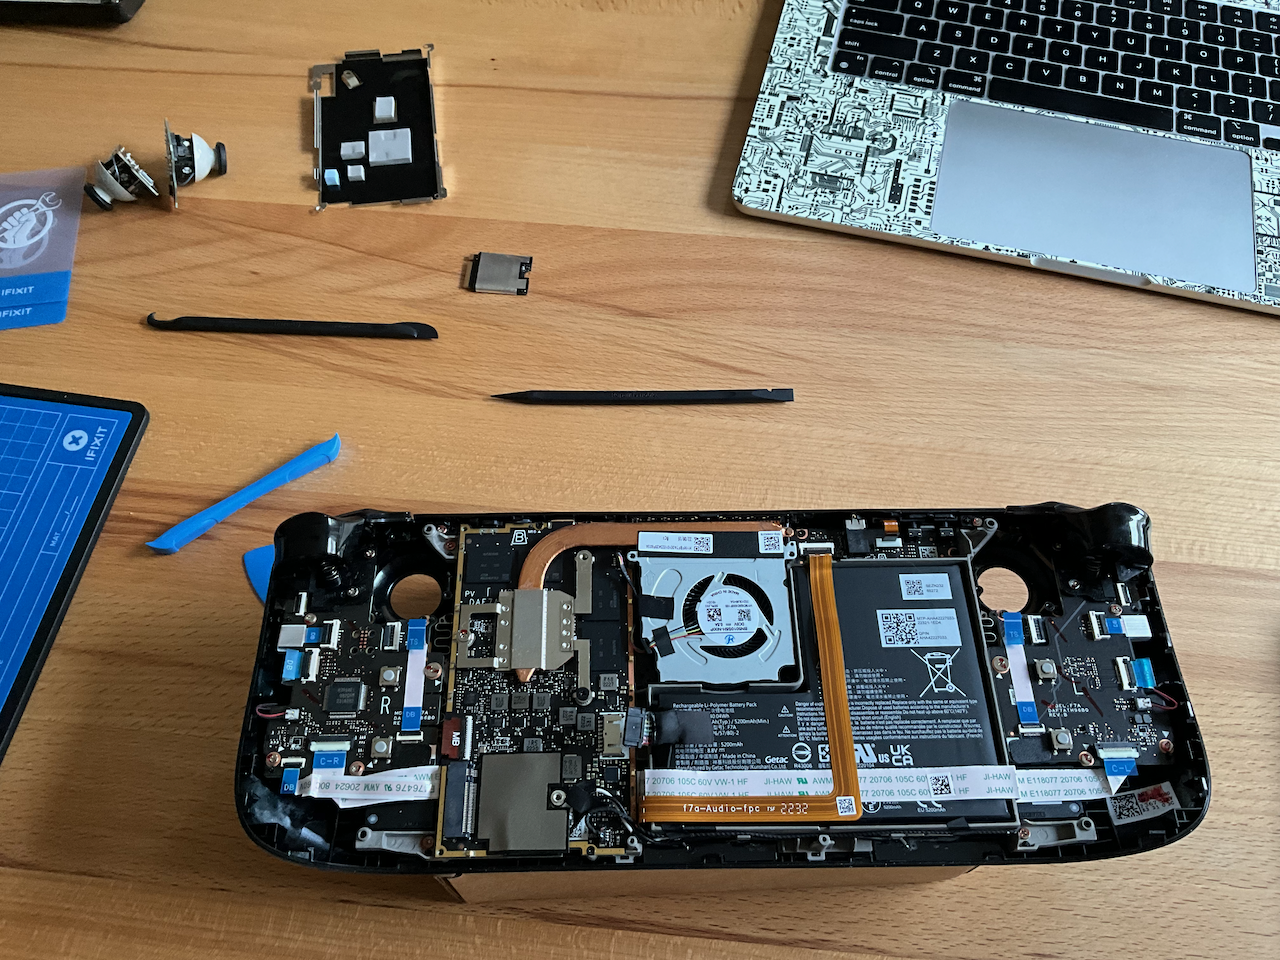
Disassembly was easy enough. Two screws were a bit reluctant, but nothing that cannot be fixed by using a flathead instead of a philips screwdriver. iFixit has great tutorials how to swap individual parts out. Reading through them before getting to work makes sense if you do not disassemble devices on a daily basis. And there are some valuable tips like checking which way you have to flip the hardware switch on the sticks. Something that is tricky when the device is disassembled. To my own surprise I did not even rip the alu foil.
Hall effect sticks are the best upgrade you can make. The precision and lack of real dead zones compared to the SteamDecks original ones make such a big difference.
Also do not be like me and work on two things in parallel. I saw an SD card on the table, did not think properly because I was having a conversation, opened the case and by doing that broke my 1TB SD card - which was still in the slot. At least I did not break the port, that would have been annoying to fix.
Installing SteamOS was surprisingly easy. Boot, click, done. Same goes for calibrating the sticks. Do not hate me for this Internet (I know you will): But this was by far the most pleasant and easy install of Arch Linux I have ever done.
For 130 euro total and 30 minutes of work the SteamDeck is now running cooler, has enough storage for me to not cry too much about the broken SD card (it was a cheap one, still unnecessary and could have been repurposed) and I appreciate the 8bitdo joysticks very much when playing Metroidvania or racing games.